One of the important construction engineering techniques to master is the technique of installing paving blocks. Paving block is a type of artificial rock that is specifically designed to coat the surface of the ground in outdoor areas, such as terraces, walkways, parking areas, parks, and so on.
Paving blocks have an important role in maintaining the appearance of the ground surface so that it becomes neater and pleasing to the eye. Check out how to install paving blocks along with an explanation of the pattern and its benefits further below.
How to Install Paving Blocks Correctly
Before entering the explanation of how to install paving blocks correctly, you must understand the three basic constructions in paving block installation. Here are the types:
- Casters: Casters are components that serve as foundations that withstand movement or friction forces that occur if there are loads borne by paving blocks, such as passing vehicles.
- Sand bedding: This construction acts as a working floor as well as interlocking paving blocks.
- Joint filler: This construction acts to create a gap between one paving block and another paving block so that it becomes soundproof and reduces the potential for collisions between paving blocks that often occur due to erosion of paving block material.
After understanding the three construction techniques for installing paving blocks, it is time for you to listen to the following explanation of how to install paving blocks:
1. Prepare Tools and Materials
First, you must prepare all the tools and materials needed for installing paving blocks. The tools you will need include:
- Hoe or shovel.
- Stake thread.
- Tamping rammer.
- Plate compactor.
- Rubber hammer.
- Wooden rafters.
- Paver splitter or block splitter.
Meanwhile, the materials you will need are:
- Concrete castings.
- Sand.
- Stone ash.
- Cast natural stone.
- Grout filler.
- Cement.
2. Level the Ground or Land for Paving Block Installation
Before starting to install paving blocks, make sure the land to be installed with paving blocks is clean from things that could potentially interfere with the installation process, such as weeds, garbage, leaves, rocks, and so on.
After the land is clean, level, and compact, the soil is prepared so that the paving block can stick perfectly. If the paving blocks will be used as a carport, the load that the paving blocks will bear will be greater.
Therefore, leveling the ground before installing paving blocks can prevent the soil from collapsing.
Read also: The Right Ratio of Cement and Sand for A Sturdy Building
3. Measuring the Slope and Height of the Land
The process of measuring the slope and height of the land before installing paving blocks is also called leveling. This process is one way to prevent wavy paving block structures after installation, as well as prevent the appearance of puddles when it rains.
If the leveling process is done correctly, rainwater will be easier to absorb into the soil, making the land free from puddles.
4. Installing Casters
After leveling, the next step is to install the casters. To install the casters, you must use backup concrete, which is often used in the construction of paving block installations.
This types of concrete can act to support the weight and help the casters to withstand the load gained by the paving blocks when they are used later. By choosing this type of concrete, the casters can be more durable and resistant to pressure.
5. Installing Sand Bedding
Once the casters are in place, it is time to install the sand bedding. There are two ways of installing sand bedding, namely pre-compacted and uncompacted.
If you are installing with the pre-compacted technique, then the first step is to compact the soil surface using a stamper plate by applying the crawling technique.
By applying the pre-compacted technique, the base of the paving block can become denser and thicker, so that it has high durability. However, the installation process using this technique tends to be time-consuming.
If you want to use the uncompacted technique, then the sand does not need to be compacted and can be directly lined. The use of this technique does not require a long time, but the soil is more likely to become loose and requires more careful calculations.
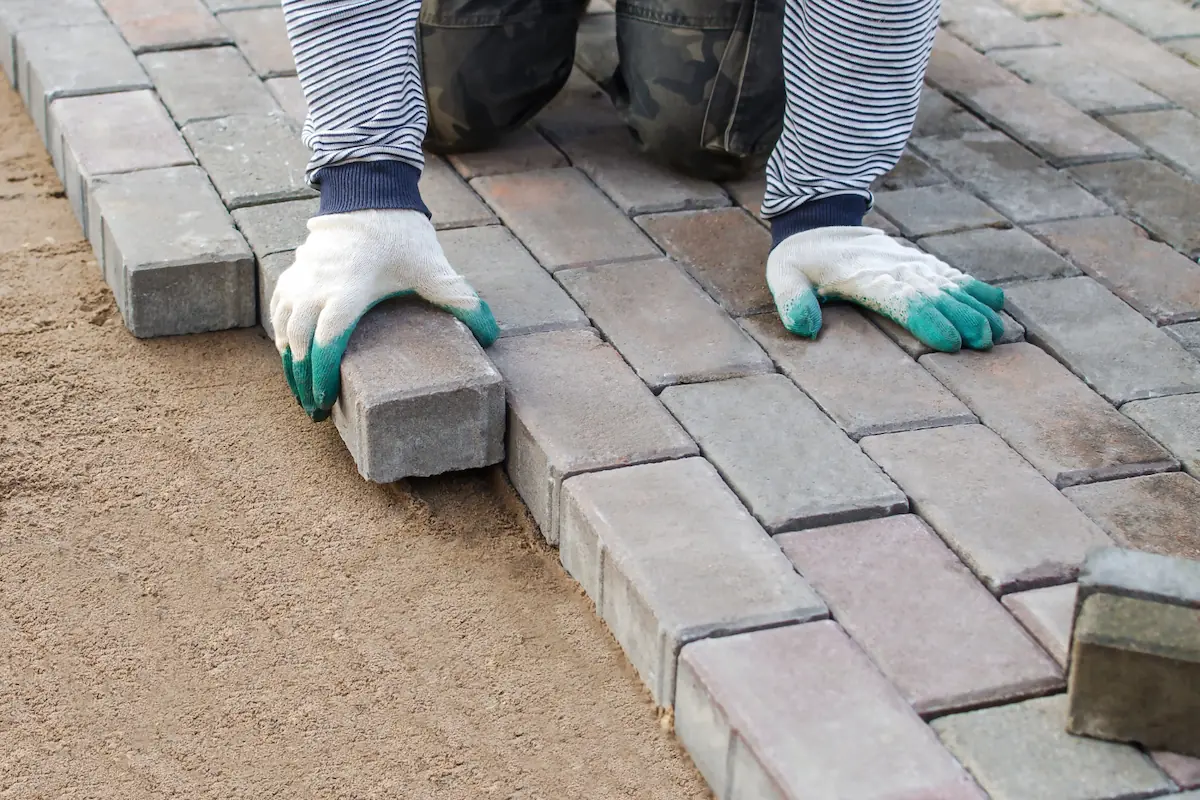
6. Arranging the Paving Blocks
After the sand bedding installation is complete, you can then start the paving block installation. The first step is to attach each side of the paving block according to the pattern you want.
Make sure that one paving block with another paving block is installed tightly and there is no gap between them. For the road area, you can adjust the size of the paving block according to your needs.
If it needs to be cut, then measure the gap that requires a paving block, and then cut the paving block according to that size.
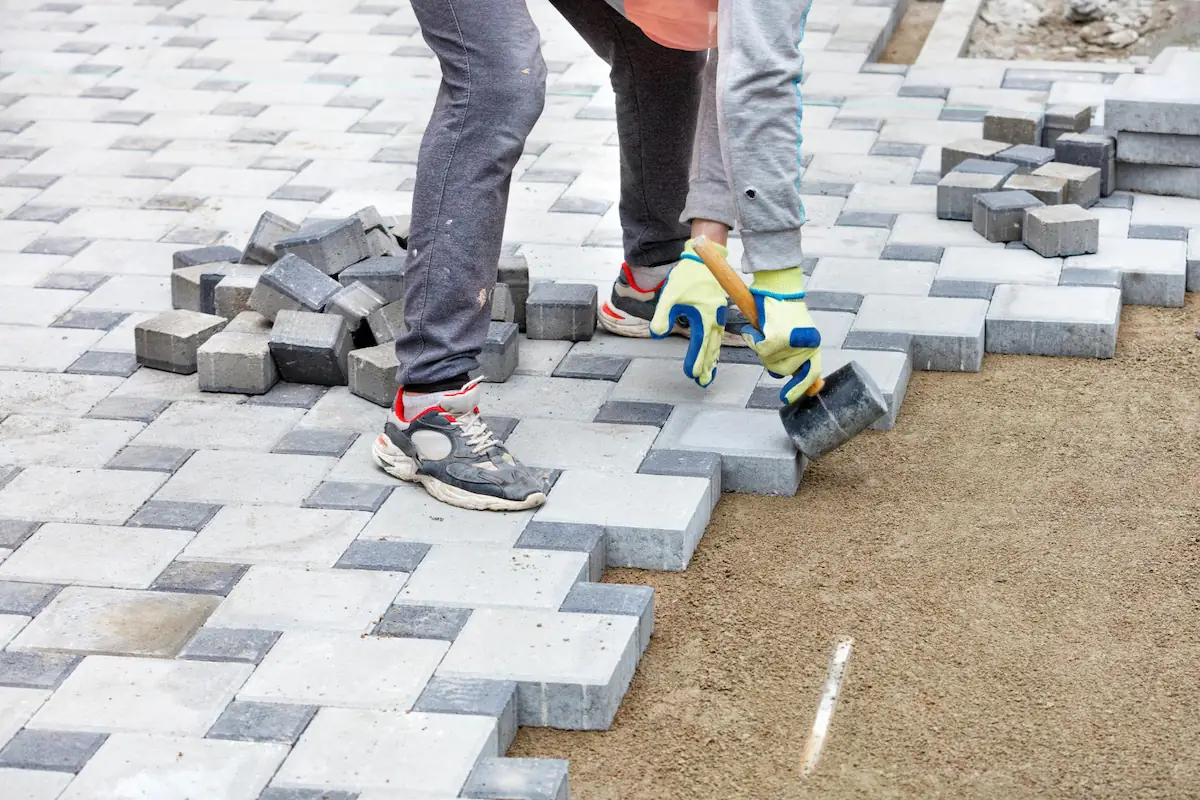
7. Filling Joint Filler
The last step in paving block installation is filling the joint filler and compacting. You must fill the gaps in the paving blocks that have been installed using sand, then compact them using a stamper plate. Do this process on the entire surface of the paving block to make it neat and strong.
Examples of Paving Block Installation Patterns
There are several paving block installation patterns that you can choose from based on how they are installed. Here are the options:
1. Basic Pattern with 1 Paving Block Model
The first and simplest pattern is the basic pattern with a paving block model. This pattern has 6 basic patterns for 1 shape or 1 size of paving block. The 6 basic patterns are straight course, brickwork, square brickwork, diagonal course, basketweave, herringbone, and diagonal herringbone.
2. Combination Pattern with 2 Paving Block Models
The next paving block installation pattern is a combination pattern of 2 paving block models. This pattern has 9 basic patterns, namely alternating, windmill, herribone inserted, cobblestone, hopscotch, offset, plaids, pinwheel, and random patterns.
3. Transitional Pattern with 2 or More Paving Block Shapes
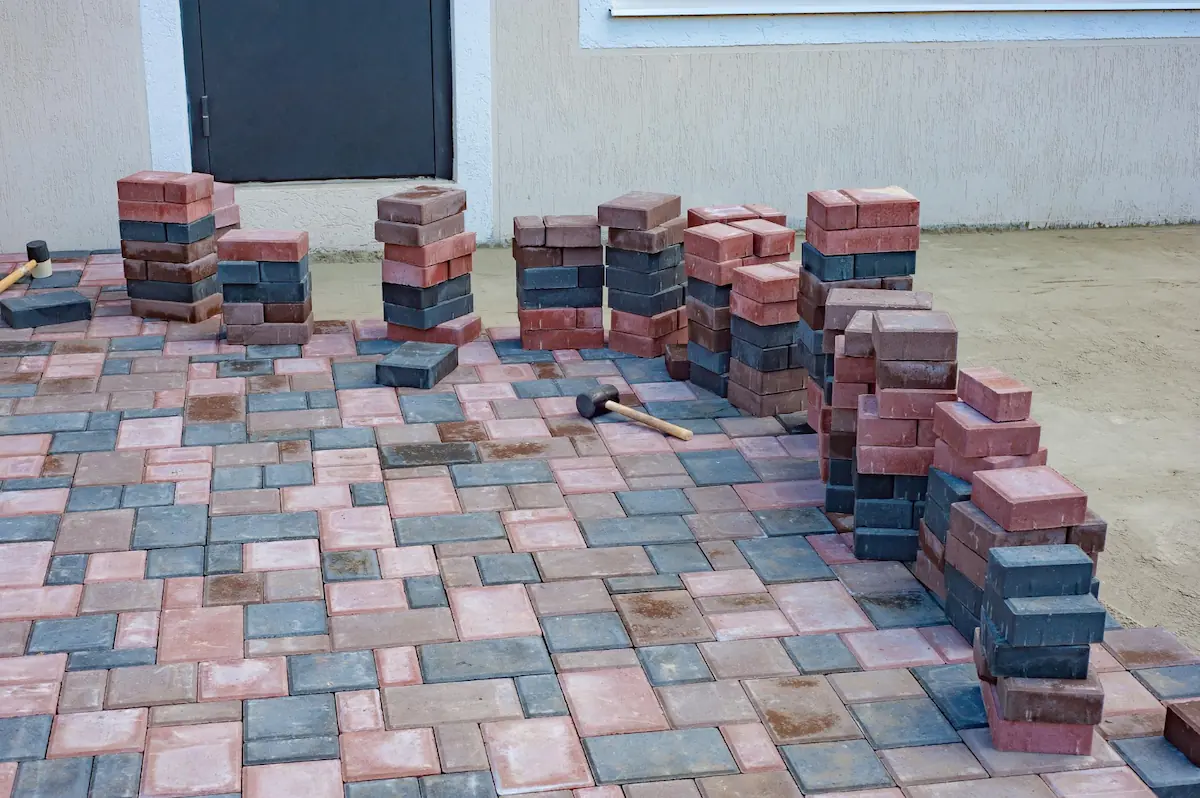
The last paving block installation pattern is the transition pattern with 2 or more paving block shapes. This type of installation has a dynamic pattern and can be customized according to the style, size, and construction needs. However, this pattern can only be used if the shape of the paving block is square or rectangular.
From the above installation patterns, you can also shape them into several motifs. The most commonly used paving block motifs are stretcher, basket weave, and herringbone.
Read also: Standard Size and Types of Beams for A 2-Storey House
Benefits of Paving Block Installation in the Home Yard
There are several benefits that you will get if you install paving blocks in your home yard. Here are the various benefits:
- Paving blocks can withstand extreme weather and have high durability, so that they can withstand greater loads, such as cars or motorbikes passing over them.
- The installation is relatively easy and efficient, but the strength is always stable and can last for a long time.
- It is an affordable investment because it can last up to 30 years and does not require significant maintenance.
- Enhances the attractiveness and tidiness of the yard.
- Helps prevent flooding, as paving blocks have pores and gaps for water to pass through.
That is the explanation of the installation of paving blocks, starting from the method, various patterns and motifs, and the benefits of installing them in the yard. So, are you interested in installing paving blocks?
If you are interested in installing paving blocks in your yard, then the selection of materials for its construction must also be right. In addition to the selection of paving blocks, one other material that is no less important is cement.
To answer this need, Semen Merah Putih has the solution, with the superior cement product, Semen Merah Putih Watershield.
Semen Merah Putih Watershield is a super premium multipurpose cement that has many advantages over ordinary cement. This cement is suitable for all building applications such as foundations, concrete slabs, castings, masonry, plastering, and skim coat.
The water repellent technology in Semen Merah Putih Watershield also provides triple protection against water seepage from outside, inside, and the ground, making it ideal for various building applications.
Want to know more about other superior products of Semen Merah Putih? Contact us to get more detailed information and further consultation about your construction needs.