
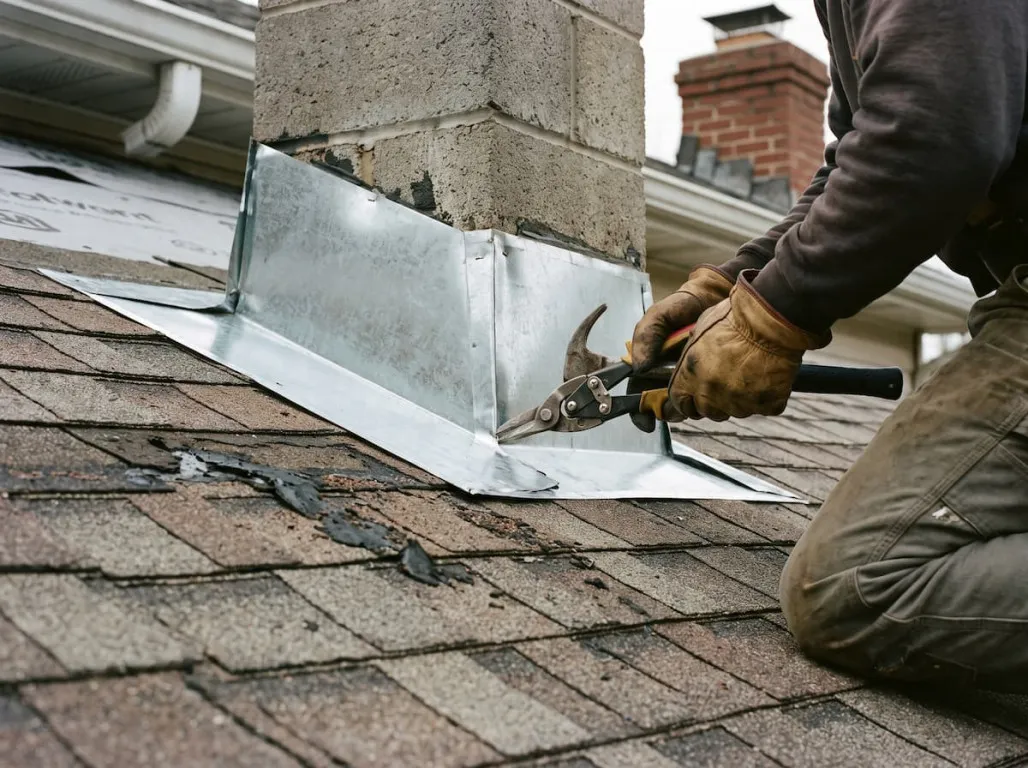
Roof flashing plays a crucial role in protecting roof areas with joints, corners, or gaps from water intrusion. This component helps direct rainwater away from the building structure, preventing it from seeping in and damaging the house.
To learn more about roof flashing, from its definition to how to install it for optimal roof protection, read this article.
What Is Roof Flashing?
Roof flashing is a protective material installed in roof areas with joints or gaps, such as where the roof meets the walls, along gutters, and at the ridge. This material directs rainwater away so it doesn't seep through gaps and cause leaks.
Flashing can be tailored to the specific roof sections that need protection. Proper installation helps reduce the risk of ceiling damage, wall seepage, and structural damage caused by water.
The choice of flashing material must also match the roof’s condition to ensure effective protection.
Roof Flashing Installation Locations
Roof flashing is typically installed on roof sections with joints, junctions, or gaps that could let water in. Its placement must match the roof’s shape and condition to ensure rainwater drains properly. Common locations for roof flashing include:
1. The Junction of Two Roof Pitches
In a two-sloped roof design, the two roof pitches meet at a junction. This area is called the roof valley and typically serves as a path for rainwater to flow. You can install valley-shaped roof flashing in this section to direct water into the gutter. This prevents water from pooling or seeping through the gap between the two roof pitches, which could cause leaks.
2. Roof-Wall Junction
The junction between the roof and the wall is an area prone to rainwater runoff. In this section, roof flashing is installed to cover the roof joint and adhere to the wall. This installation method directs water away from the wall’s surface, preventing it from seeping into joint gaps.
3. Skylight
A skylight has joints that need protection from rainwater entering the house. Install roof flashing around the edges of the skylight to seal the gap between the skylight and the roof surface. This protection channels rainwater away from the joints, reducing the risk of leaks and seepage.
4. Roof Edges Without Eaves
On roofs without eaves, rainwater can fall directly onto the walls below. If this occurs continuously, it can cause damp walls and damage their surfaces. Roof flashing at the roof edges helps direct water away from the walls so it doesn't hit them directly.
Read also: The Right Ratio of Cement and Sand for A Sturdy Building
Benefits of Roof Flashing
Roof flashing offers several benefits for roof protection and the building's overall condition. This component not only helps reduce the risk of leaks but also simplifies maintenance and helps protect the building. Here are some key benefits of roof flashing you should know:
1. Helps Prevent Leaks
Roof flashing helps seal gaps at the joints between the roof and walls, which are prone to water infiltration. When it rains, it directs water away so it doesn't seep through these gaps.
This protection can reduce the risk of water-related problems, such as damp walls, peeling paint, and mold growth. As a result, the building's interior remains well maintained.
2. Resistant to Various Weather Conditions
Roof flashing is made from materials designed to withstand a variety of weather conditions. Sunlight, rain, humidity, and temperature changes do not easily damage roof flashing.
With the right materials and proper installation, roof flashing can last a long time without needing frequent replacement.
3. Practical Installation
Roof flashing is fairly easy to install because it can conform to the shape and position of the roof area that needs protection. The process requires only a few steps, but it must be done carefully to ensure that every part is securely fastened. With proper installation, the job can be completed quickly.
4. Helps Maintain the Building’s Condition
Proper roof flashing can also help keep the roof well maintained and reduce the risk of leaks. This maintenance can be a selling point for potential buyers, as it shows this part of the building is well maintained. A well-maintained building can also add value when you sell the property.
5. Requires No Complicated Maintenance
Roof flashing is relatively easy to maintain because it does not require special care. You can maintain its condition by cleaning off accumulated dirt and periodically inspecting the joints.
These simple inspections help detect damage early, such as shifted, cracked, or loosening parts. With routine maintenance, roof flashing can keep functioning properly without frequent repairs.
How to Install Roof Flashing
Before installing roof flashing, prepare a few things to ensure the process goes smoothly and the result effectively protects the roof area. Install it meticulously, from preparing the equipment to ensuring every joint is tightly sealed. The steps are as follows:
1. Prepare Materials and Tools
To create roof flashing tailored to the roof’s needs, cut and shape the metal using cutting tools. Materials you can use include aluminum, galvalume, copper, and stainless steel.
During installation, measuring tools and a pencil help you determine the correct dimensions. Use rust-resistant screws or nails as fasteners, and use sealant to seal gaps at the joints.
2. Measure the Area Where It’s Installed
Adjust the flashing size to fit the section of the roof it will protect. Measure the material first, then cut it to match the length and shape of the installation area. Cut flashing pieces slightly longer so the overlapping sections can cover each other. This helps seal gaps and reduces the chance of water entering through the roof joints.
Read also: 12 Ways to Improve Home’s Air Circulation, Easy & Effective!
3. Place the Flashing in the Correct Area
Not all parts of the roof need flashing in the same shape or position. You typically need this material at points prone to water flow, especially where two building surfaces meet.
For example, at the wall-to-roof junction, flashing acts as a barrier to prevent water from seeping into gaps. In the roof valley, flashing follows the two roof sides where they meet, allowing water to flow toward the gutter. Meanwhile, the edges of skylights and chimneys also require protection to prevent these joints from becoming entry points for water.
4. Secure and Seal the Joints
Once the dimensions are accurate, secure the flashing using rust-resistant screws or nails. These fasteners keep the material in place and prevent it from shifting.
Then seal small gaps around the joints with sealant. This step helps prevent rainwater from seeping into the roof interior.
5. Check the Installation Results
Recheck the installed sections, especially at the joints and ends of the flashing. Make sure there are no loose parts or still-open gaps. You can also check the flashing's condition by running water over the roof area to see if any water is still seeping in.
Improper installation can prevent the flashing from functioning optimally. If installing the flashing seems difficult or requires more detailed work, hire a professional. An expert can help ensure every part is installed correctly and reduce the risk of roof leaks.
That concludes the explanation of roof flashing, from its definition to its installation. This component plays a crucial role in reducing the risk of water entering through gaps or joints in the roof. However, protecting the building from water also requires attention to other parts of the structure.
The quality of the materials used also affects long-term building conditions. Durable materials that reduce seepage can protect structural elements, especially in areas frequently exposed to water.
One material you can use for this purpose is Semen Merah Putih Watershield. This product features water-repellent technology with triple protection that helps shield against three sources of seepage: water from the outside, from the inside, and from the ground.
This capability makes Semen Merah Putih Watershield suitable for various construction areas that require seepage protection. This product is also a super-premium multipurpose cement, so it's not limited to just one type of job.
Semen Merah Putih Watershield can be applied to foundation work, concrete slabs, concrete pouring, bricklaying, plastering, and even finishing. Choosing the right product for the job can help create a stronger, more durable structure that's easier to maintain.
If you are preparing materials for a construction project, contact us for more information about our products and their applications.
Read also: How Much Does It Cost to Renovate A House? Find Out Here!